如何在NodeJS中使用techblik.com API查询DNS记录
本教程将向您展示如何在NodeJS环境中使用techblik.com提供的API来查询任何域名的DNS记录。
我们将编写一个简单的脚本,它的功能是当运行时,能显示出Google搜索服务器的IP地址。该脚本的核心是利用techblik.com的DNS查询API。
为了实现这一目标,我们将采用三种不同的方法。第一种方法是使用NodeJS内置的`https`模块;第二种方法是借助`node-fetch`模块;最后,我们将使用`axios`客户端库。
techblik.com API是什么?
techblik.com API 提供了一套RESTful API,用于进行网站性能、DNS和安全指标的测试。它支持诸如屏幕截图、生成PDF、网络爬虫、端口扫描等多种功能。
准备工作
要顺利完成本教程,您需要具备一定的JavaScript编程基础,包括理解Promise和ES6语法。在软件方面,您需要安装NodeJS和一个文本编辑器,例如Visual Studio Code。
此外,为了发出请求,您需要一个techblik.com账户,以便获取用于身份验证的API密钥。您可以通过访问API登录页面并创建一个免费账户来获得此密钥。
创建账户后,您将被重定向到仪表板,您的API密钥将在那里找到。
项目构建
首先,创建一个项目文件夹,并在您选择的终端中打开它,然后执行以下命令:
npm init -y
上述命令会将当前目录初始化为一个NodeJS项目。
接下来,执行以下命令安装项目所需的依赖项:
npm install dotenv axios node-fetch
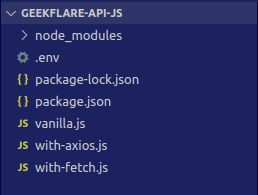
成功安装依赖项后,在项目根目录下创建三个文件:`vanilla.js`、`with-axios.js`、`with-fetch.js`,以及一个`.env`文件用于存储环境变量。
最终,项目根目录的结构应如下所示:
打开`.env`文件,并添加您的techblik.com API密钥,如下所示:
API_KEY=<您的API密钥>
请将`<您的API密钥>`替换为您实际的API密钥。
vanilla.js
NodeJS内置了`http`和`https`模块,我们可以使用它们来发起客户端请求。首先,我们将采用这种方法。
打开`vanilla.js`文件,并在顶部引入以下代码行,以导入项目依赖项:
import { request } from "https";
import { config } from "dotenv";
接下来,我们将调用`config()`函数来加载环境变量。然后将API密钥和主机名存储在变量中:
config();

const apiKey = process.env.API_KEY;
const host="google.com";
当我们在NodeJS中调用`request`函数来发起HTTP请求时,我们需要提供一些选项,包括目标主机和端点、HTTP方法以及请求头。因此,接下来我们将创建一个变量来存储这些选项:
const options = {
  hostname: "api.techblik.com",
  path: "/dnsrecord",
  method: "POST",
  headers: {
    "Content-Type": "application/json",
    "x-api-key": apiKey,
  },
};
目前,`vanilla.js`文件的代码应如下所示:
import { request } from "https";
import { config } from "dotenv";

config();

const apiKey = process.env.API_KEY;
const host="google.com"

const options = {
  hostname: "api.techblik.com",
  path: "/dnsrecord",
  method: "POST",
  headers: {
    "Content-Type": "application/json",
    "x-api-key": apiKey,
  },
};
现在我们可以继续调用传入`options`的`request`函数:
const req = request(options, response => {

  // 这里我们将添加响应处理程序

});
如您所见,`request`函数接受两个参数。第一个是我们之前定义的选项对象。第二个是一个回调函数,它将处理来自服务器的响应。在回调函数中,我们可以添加事件监听器,用于服务器何时发送数据、完成发送数据或发送错误。
要添加不同的响应处理程序,请在回调函数中添加以下代码行:
let data = "";

response.on("data", chunk => {
  data += chunk;
});

response.on("end", () => {
  console.log(JSON.parse(data).data.A);
});

response.on("error", error => {
  console.log(error);
});
`data`变量只是一个字符串,我们将在这里存储来自服务器的JSON响应,因为它会逐步返回给我们。
为了实际存储数据,我们将监听响应对象的`on data`事件。每当触发此事件时,我们都会将服务器发送的数据块追加到`data`变量中。
然后为了最终使用数据,我们将在响应对象上监听`on end`事件。当服务器发送完所有数据并结束响应时,将调用此方法。
最后,我们将监听错误并将它们记录到控制台(如果出现错误)。
因此对`request`函数的调用应如下所示:
const req = request(options, response => {

  let data = "";

  response.on("data", chunk => {
    data += chunk;
  });

  response.on("end", () => {
    console.log(JSON.parse(data).data.A);
  });

  response.on("error", error => {
    console.log(error);
  });

});
最后,我们需要将一些数据写入请求体并结束请求:
req.write(JSON.stringify({ url: host, types: ["A"] }));
req.end();
最终,该文件应如下所示:
import { request } from "https";
import { config } from "dotenv";

config();

const apiKey = process.env.API_KEY;
const host="google.com"

const options = {
  hostname: "api.techblik.com",
  path: "/dnsrecord",
  method: "POST",
  headers: {
    "Content-Type": "application/json",
    "x-api-key": apiKey,
  },
};

const req = request(options, response => {

  let data = "";

  response.on("data", chunk => {
    data += chunk;
  });

  response.on("end", () => {
    console.log(JSON.parse(data).data.A);
  });

  response.on("error", error => {
    console.log(error);
  });

});

req.write(JSON.stringify({ url: host, types: ["A"] }));
req.end();
现在,如果您返回终端并使用`node vanilla.js`命令运行脚本,您应该会得到以下输出:
[
  { address: '172.253.122.101', ttl: 247 },
  { address: '172.253.122.113', ttl: 247 },
  { address: '172.253.122.100', ttl: 247 },
  { address: '172.253.122.102', ttl: 247 },
  { address: '172.253.122.138', ttl: 247 },
  { address: '172.253.122.139', ttl: 247 }
]
这就是第一部分。使用内置`HTTP/S`模块的缺点是代码过于冗长。客户端库如`node-fetch`可以帮助您创建相同的程序,但代码更清晰简洁。
node-fetch
要使用`node-fetch`创建相同的脚本,请打开`with-fetch.js`文件并将以下导入添加到顶部:
import fetch from "node-fetch";
import { config } from "dotenv";
然后调用`config`函数配置环境变量,并为API_KEY和我们要查询A记录的主机设置常量:
config();

const apiKey = process.env.API_KEY;
const host="google.com"
接下来,我们将定义一个函数来执行API调用。此函数将是异步的:
async function request() {
  // 函数体将在这里
}
在函数体内部,我们需要调用之前从`node-fetch`包中导入的`fetch`函数:
const response = await fetch("https://api.techblik.com/dnsrecord", {
    method: "POST",
    headers: {
      "Content-Type": "application/json",
      "x-api-key": apiKey,
    },
    body: JSON.stringify({ url: host, types: ["A"] }),
});
然后在调用`fetch`函数之后,我们想要解析我们的响应并处理可能出现的任何错误:
if (response.ok) {
    const { data } = await response.json();

    console.log(data.A);
  } else {
    console.log(response);
  }
此时,在请求后添加对该函数的调用:
request();
您的文件现在应如下所示:
import fetch from "node-fetch";
import { config } from "dotenv";

config();

const apiKey = process.env.API_KEY;
const host = "google.com";

async function request() {
  const response = await fetch("https://api.techblik.com/dnsrecord", {
    method: "POST",
    headers: {
      "Content-Type": "application/json",
      "x-api-key": apiKey,
    },
    body: JSON.stringify({ url: host, types: ["A"] }),
  });

  if (response.ok) {
    const { data } = await response.json();

    console.log(data.A);
  } else {
    console.log(response);
  }
}

request();
使用`node with-fetch.js`运行该脚本应该会产生以下输出:
[
  { address: '172.253.122.113', ttl: 134 },
  { address: '172.253.122.138', ttl: 134 },
  { address: '172.253.122.100', ttl: 134 },
  { address: '172.253.122.139', ttl: 134 },
  { address: '172.253.122.102', ttl: 134 },
  { address: '172.253.122.101', ttl: 134 }
]
axios
最后,我们将使用Axios访问techblik.com API。首先,让我们导入dotenv和axios包:
import axios from "axios";
import { config } from "dotenv";
接下来,让我们调用`config`函数来设置环境变量。此外,让我们将主机名和API密钥存储在单独的常量中:
const host = "google.com";
const key = process.env.API_KEY;
现在,让我们将API端点的URL存储在另一个常量中:
const url = "https://api.techblik.com/dnsrecord";
接下来,让我们将作为请求正文发送的数据存储在另一个常量中:
const data = { url: host, types: ["A"] };
然后在发送请求之前要做的最后一件事是将元选项(例如标头)存储在另一个常量中:
const options = {
  headers: {
    "Content-Type": "application/json",
    "x-api-key": key,
  },
};
最后,让我们调用我们之前导入的`post`函数,传入我们之前定义的`url`、`data`和`options`变量作为参数。因为这将返回一个Promise,所以您可以在最终返回时使用`then`来处理响应:
axios.post(url, data, options).then(({ data }) => {
  console.log(data.data.A);
});
最后,`with-axios`文件中的代码应如下所示:
import axios from "axios";
import { config } from "dotenv";

config();
const host = "google.com";
const key = process.env.API_KEY;

const url = "https://api.techblik.com/dnsrecord";
const data = { url: host, types: ["A"] };
const options = {
  headers: {
    "Content-Type": "application/json",
    "x-api-key": key,
  },
};

axios.post(url, data, options).then(({ data }) => {
  console.log(data.data.A);
});
当您使用`node with-axios.js`运行脚本时,它应该显示以下输出:
[
  { address: '142.251.163.138', ttl: 60 },
  { address: '142.251.163.113', ttl: 60 },
  { address: '142.251.163.100', ttl: 60 },
  { address: '142.251.163.101', ttl: 60 },
  { address: '142.251.163.102', ttl: 60 },
  { address: '142.251.163.139', ttl: 60 }
]
总结
在本文中,我们使用了三种不同的方法创建了脚本。这样做是为了强调使用techblik.com API是多么容易,以及我们如何在Javascript,特别是NodeJS中使用它。
请查阅techblik.com API文档了解更多信息。